Overall
Athletic Wall Pad Installation Guidelines
STANDARD WALL PANEL INSTALLATION GUIDELINES

Overall
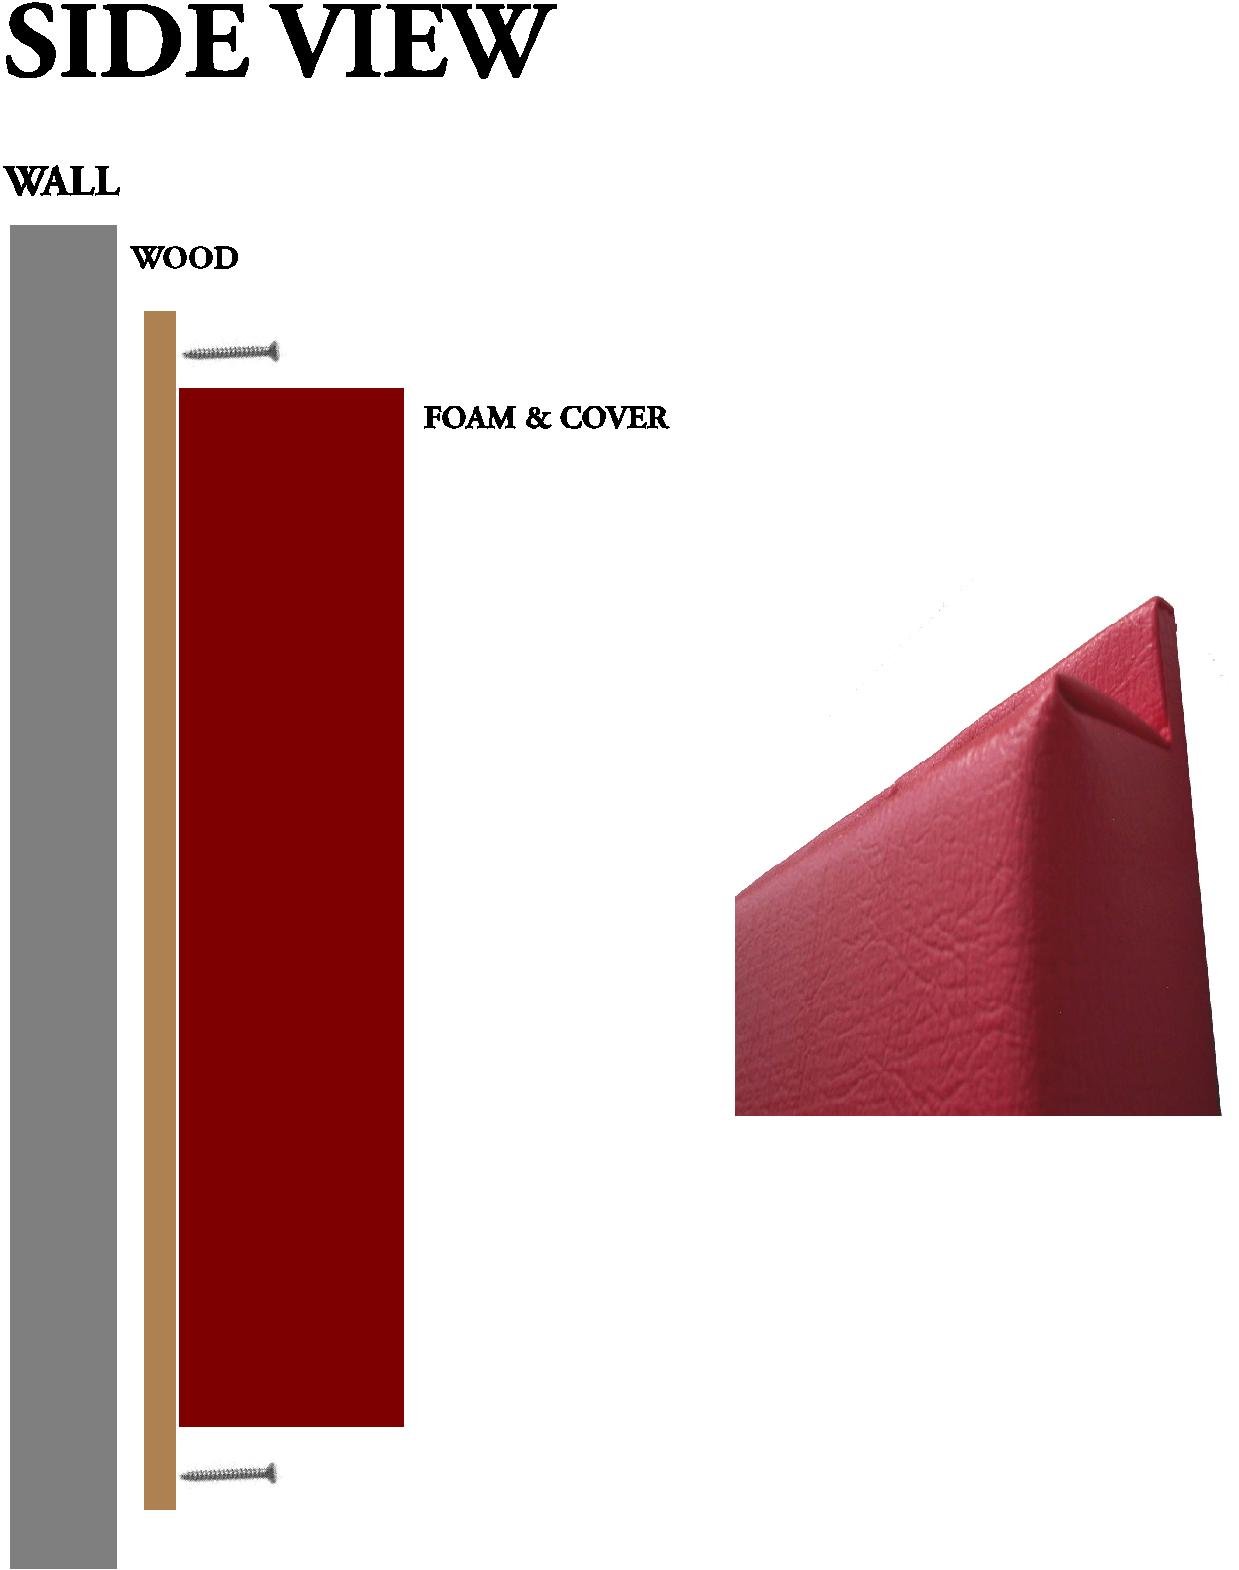
Athletic Wall Pads feature a 7/16” thick wood backing which have a 1” wide vinyl covered lip on the top and on the bottom of each pad for "direct-to-wall" permanent mounting.
- Drill two holes at the top and two holes at the bottom of each 1” wide mounting lip.
- Mark a level line across the area to be padded. Line the wall panel up near your starting point. It is best to have somebody hold the wall panel in place while someone measures the appropriate height and levels the pad. Sometimes it is easier if you start in the corner.
- Hold the panel in place where it is to be secured to the wall. If you are mounting into brick, we recommend, after drilling the holes in the wood lip of the pad, that you hold the pad up to the wall completely level where you want the pad to be mounted. Make sure your measurements are correct.
- With a concrete bit, drill marker holes using the existing holes in the pad as a guide. Caution: As soon as the drill bit makes a mark on the wall for each of the holes pull the pad away to keep the concrete dust from getting all over it or damaging the new pad.
- Use 1/4” x 2” Tapcon (c) Concrete Anchors to secure top and bottom panel lips to wall. Finish drilling the holes and then place the pad back on the wall and use tap-con concrete anchors until secure. Usually a 1 ½” or 2” screw will do the job.
- Then, just line the other pads up to the first one you mounted and install one at a time. Continue to make sure the pads are level throughout the installation process. Cover each newly installed Wall Pad with a tarpaulin or similar material to keep them from getting coated with concrete dust during the process.
- Stained or painted wood molding strips can be applied to the top mounting lip to improve the over all appearance of the unit. The bottom mounting lip is almost imposible to be seen and need not be finished in this manner.
- Click HERE to refer to plan drawing for a typical Wall Padding Panel layout. Note the way cutouts for wall plugs, light switches, door knobs and observation windows are indicated. A Seclusion Room would have its wall panels mounted flush with the top of the floor padding. The cutouts can be accomplished in the mill based on field measurements provided by client. Cutouts can also be created on site by others. Removal of the padding and wood backer to reveal the door knob, as an example, must be done in such a way as to leave the outer vinyl cover so it van be used to cover the inner wall of the cutout and be secured to the back of the Wall Pad securely.
FAST TRACK WALL PANEL INSTALLATION GUIDELINES
Overall
Athletic Wall Pads with Fast Track Mounting Hardware feature a 7/16” wood back with an extruded aluminum mounting track afixed to the top area of the back of each panel, which is engineered to clip onto a second piece of track that has been already mounted to the wall. Line the Wall Panel track with the track installed on the wall and slide the Wall Panel into place. Use the 1” wide vinyl covered mounting lip at the bottom of the Wall Panel for adhering permanently to the wall.
- Mark a level line across the area to be padded.
- Use 1/4” x 2” Tapcon (c) Concrete Anchors to secure mounting track to the wall.
- Line up mounting track on back of Wall Panel with track mounted to wall and slide onto wall track.
- Drill two holes in the lower 1” wide mounting lip.
- Use 1/4” x 2” Tapcon (c) Concrete Anchors to secure bottom of Wall Panel to wall.
SECLUSION ROOM FLOOR PADDING INSTALLATION GUIDELINES
Overall
Seclusion Room Floor Padding can be supplied in sections to facilitate shipping requirements and can include an optional one-piece Top Cover to faciitate maintenance and cleaning. The sections are held together with factory installed Heavy Duty Velcro on the connecting edges. The one-piece Top Cover is furnished with Velcro connectors that get secured to the underside of the padding.
| |
| |
| |
| |
| |
| |
| |
| |
Site
Map: The Mat King Web Site in Overview
|
|
| |
| THE
MAT KING
740 West End Avenue; Suite 1
New York, NY 10025 USA
Phone: (646)998-4208
Fax: (646)998-4073
Phone: 800-442-6544
Fax: 800-Mats-Fax (628-7329)
Phone: 800-442-6544
Fax: 800-Mats-Fax (628-7329)
 |
| |


![]()
